Добавление пробела / заполнения в UILabel
у меня есть UILabel где я хочу добавить пространство в верхней и в нижней части.
С минимальной высотой в constrainst я изменил его на:

изменить:
Для этого я использовал:
  override func drawTextInRect(rect: CGRect) {

        var insets: UIEdgeInsets = UIEdgeInsets(top: 0.0, left: 10.0, bottom: 0.0, right: 10.0)

        super.drawTextInRect(UIEdgeInsetsInsetRect(rect, insets))


    }
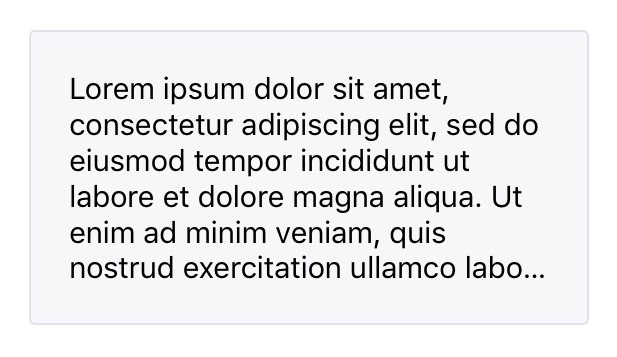
но я должен найти другой метод, потому что если я пишу больше двух строк, проблема одна и та же:

25 ответов:
если вы хотите придерживаться UILabel, не разделяя его на подклассы, Mundi дал вам четкое решение.
если в качестве альтернативы вы хотите избежать обертывания UILabel с помощью UIView, вы можете использовать UITextView для включения использования UIEdgeInsets (padding) или подкласса UILabel для поддержки UIEdgeInsets.
С помощью UITextView вам нужно будет только предоставить вставки (OBJ-C):
textView.textContainerInset = UIEdgeInsetsMake(10, 0, 10, 0);альтернатива, если вы не разделяете UILabel, примером такого подхода будет переопределение drawTextInRect метод
(OBJ-C)- (void)drawTextInRect:(CGRect)uiLabelRect { UIEdgeInsets myLabelInsets = {10, 0, 10, 0}; [super drawTextInRect:UIEdgeInsetsInsetRect(uiLabelRect, myLabelInsets)]; }вы можете дополнительно предоставить свой новый подкласс UILabel с переменной insets для верхнего, левого, нижнего и правого.
пример кода может быть:
In .h (OBJ-C)
float topInset, leftInset,bottomInset, rightInset;In .m (OBJ-C)
- (void)drawTextInRect:(CGRect)uiLabelRect {
    [super drawTextInRect:UIEdgeInsetsInsetRect(uiLabelRect, UIEdgeInsetsMake(topInset,leftInset,bottomInset,rightInset))];
}
изменить #1:
из того, что я видел, кажется, вам нужно переопределить intrinsicContentSize UILabel при его подклассе.
так что вы должны переопределить intrinsicContentSize как:
- (CGSize) intrinsicContentSize {
    CGSize intrinsicSuperViewContentSize = [super intrinsicContentSize] ;
    intrinsicSuperViewContentSize.height += topInset + bottomInset ;
    intrinsicSuperViewContentSize.width += leftInset + rightInset ;
    return intrinsicSuperViewContentSize ;
}
и добавьте следующий метод для редактирования вставки, вместо того чтобы редактировать их по отдельности:
- (void) setContentEdgeInsets:(UIEdgeInsets)edgeInsets {
    topInset = edgeInsets.top;
    leftInset = edgeInsets.left;
    rightInset = edgeInsets.right;
    bottomInset = edgeInsets.bottom;
    [self invalidateIntrinsicContentSize] ;
}
он обновит размер вашего UILabel, чтобы соответствовать краевым вставкам и покрыть многострочную необходимость вас упоминается.
Edit #2
после поиска немного, я нашел это суть с IPInsetLabel. Если ни одно из этих решений не работает, вы можете попробовать его.
Edit #3
был аналогичный вопрос (дубликат) по этому вопросу.
Полный список доступных решений см. В следующем ответе:текстовое поле UILabel
Я пробовал с ним на Swift 4, надеюсь, это сработает для вас!
@IBDesignable class PaddingLabel: UILabel {

    @IBInspectable var topInset: CGFloat = 5.0
    @IBInspectable var bottomInset: CGFloat = 5.0
    @IBInspectable var leftInset: CGFloat = 7.0
    @IBInspectable var rightInset: CGFloat = 7.0

    override func drawText(in rect: CGRect) {
        let insets = UIEdgeInsets.init(top: topInset, left: leftInset, bottom: bottomInset, right: rightInset)
        super.drawText(in: UIEdgeInsetsInsetRect(rect, insets))
    }

    override var intrinsicContentSize: CGSize {
        let size = super.intrinsicContentSize
        return CGSize(width: size.width + leftInset + rightInset,
                      height: size.height + topInset + bottomInset)
    }
}
Swift 3
import UIKit

class PaddingLabel: UILabel {

   @IBInspectable var topInset: CGFloat = 5.0
   @IBInspectable var bottomInset: CGFloat = 5.0
   @IBInspectable var leftInset: CGFloat = 5.0
   @IBInspectable var rightInset: CGFloat = 5.0

   override func drawText(in rect: CGRect) {
      let insets = UIEdgeInsets(top: topInset, left: leftInset, bottom: bottomInset, right: rightInset)
      super.drawText(in: UIEdgeInsetsInsetRect(rect, insets))
   }

   override var intrinsicContentSize: CGSize {
      get {
         var contentSize = super.intrinsicContentSize
         contentSize.height += topInset + bottomInset
         contentSize.width += leftInset + rightInset
         return contentSize
      }
   }
}
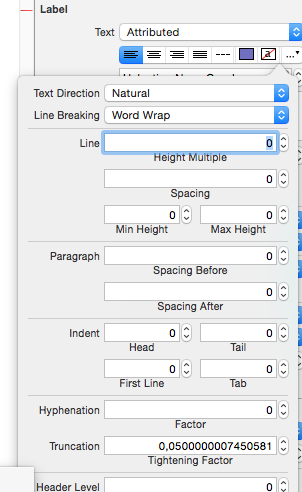
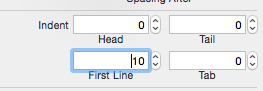
вы можете сделать это правильно из IB:
- изменить текст на attributed
- перейти к выпадающему списку с "..."
- вы увидите некоторые свойства заполнения для строк, абзацев и текста изменить отступ первой строки или все, что вы хотите
- Регистрация результат

SWIFT 3/4
простое в использовании решение, доступное для всех детей UILabel в проекте.
пример:
let label = UILabel()
    label.<Do something>
    label.padding = UIEdgeInsets(top: 0, left: 16, bottom: 0, right: 0)
Расширение UILabel
import UIKit

extension UILabel {
    private struct AssociatedKeys {
        static var padding = UIEdgeInsets()
    }

    public var padding: UIEdgeInsets? {
        get {
            return objc_getAssociatedObject(self, &AssociatedKeys.padding) as? UIEdgeInsets
        }
        set {
            if let newValue = newValue {
                objc_setAssociatedObject(self, &AssociatedKeys.padding, newValue as UIEdgeInsets!, objc_AssociationPolicy.OBJC_ASSOCIATION_RETAIN_NONATOMIC)
            }
        }
    }

    override open func draw(_ rect: CGRect) {
        if let insets = padding {
            self.drawText(in: UIEdgeInsetsInsetRect(rect, insets))
        } else {
            self.drawText(in: rect)
        }
    }

    override open var intrinsicContentSize: CGSize {
        guard let text = self.text else { return super.intrinsicContentSize }

        var contentSize = super.intrinsicContentSize
        var textWidth: CGFloat = frame.size.width
        var insetsHeight: CGFloat = 0.0

        if let insets = padding {
            textWidth -= insets.left + insets.right
            insetsHeight += insets.top + insets.bottom
        }

        let newSize = text.boundingRect(with: CGSize(width: textWidth, height: CGFloat.greatestFiniteMagnitude),
                                        options: NSStringDrawingOptions.usesLineFragmentOrigin,
                                        attributes: [NSAttributedStringKey.font: self.font], context: nil)

        contentSize.height = ceil(newSize.size.height) + insetsHeight

        return contentSize
    }
}
просто использовать
UIViewв качестве супервизора и определить фиксированное поле для метки с автоматической компоновкой.
просто используйте UIButton,его уже встроенный. Отключите все дополнительные функции кнопок, и у вас есть метка, на которую вы можете установить edge instets.
let button = UIButton()
button.contentEdgeInsets = UIEdgeInsets(top: 5, left: 5, bottom: 5, right: 5)
button.setTitle("title", for: .normal)
button.tintColor = .white // this will be the textColor
button.isUserInteractionEnabled = false
Без Раскадровки:
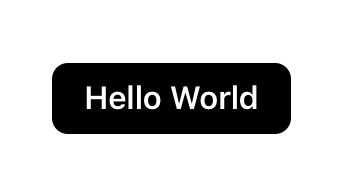
class PaddingLabel: UILabel {

    var topInset: CGFloat
    var bottomInset: CGFloat
    var leftInset: CGFloat
    var rightInset: CGFloat

    required init(withInsets top: CGFloat, _ bottom: CGFloat,_ left: CGFloat,_ right: CGFloat) {
        self.topInset = top
        self.bottomInset = bottom
        self.leftInset = left
        self.rightInset = right
        super.init(frame: CGRect.zero)
    }

    required init?(coder aDecoder: NSCoder) {
        fatalError("init(coder:) has not been implemented")
    }

    override func drawText(in rect: CGRect) {
        let insets = UIEdgeInsets(top: topInset, left: leftInset, bottom: bottomInset, right: rightInset)
        super.drawText(in: UIEdgeInsetsInsetRect(rect, insets))
    }

    override var intrinsicContentSize: CGSize {
        get {
            var contentSize = super.intrinsicContentSize
            contentSize.height += topInset + bottomInset
            contentSize.width += leftInset + rightInset
            return contentSize
        }
    }
}
использование:
let label = PaddingLabel(8, 8, 16, 16)
label.font = .boldSystemFont(ofSize: 16)
label.text = "Hello World"
label.backgroundColor = .black
label.textColor = .white
label.textAlignment = .center
label.layer.cornerRadius = 8
label.clipsToBounds = true
label.sizeToFit()

view.addSubview(label)
результат:
Swift 3 код с примером реализации
class UIMarginLabel: UILabel {

    var topInset:       CGFloat = 0
    var rightInset:     CGFloat = 0
    var bottomInset:    CGFloat = 0
    var leftInset:      CGFloat = 0

    override func drawText(in rect: CGRect) {
        let insets: UIEdgeInsets = UIEdgeInsets(top: self.topInset, left: self.leftInset, bottom: self.bottomInset, right: self.rightInset)
        self.setNeedsLayout()
        return super.drawText(in: UIEdgeInsetsInsetRect(rect, insets))
    }
}

class LabelVC: UIViewController {

    //Outlets
    @IBOutlet weak var labelWithMargin: UIMarginLabel!

    override func viewDidLoad() {
        super.viewDidLoad()

        //Label settings.
        labelWithMargin.leftInset = 10
        view.layoutIfNeeded()
    }
}
Не забудьте добавить имя класса UIMarginLabel в объект метки раскадровки. Счастливого Кодирования!
Подкласс UILabel. (File-New-File-CocoaTouchClass-сделать подкласс UILabel).
//  sampleLabel.swift

import UIKit

class sampleLabel: UILabel {

 let topInset = CGFloat(5.0), bottomInset = CGFloat(5.0), leftInset = CGFloat(8.0), rightInset = CGFloat(8.0)

 override func drawTextInRect(rect: CGRect) {

  let insets: UIEdgeInsets = UIEdgeInsets(top: topInset, left: leftInset, bottom: bottomInset, right: rightInset)
  super.drawTextInRect(UIEdgeInsetsInsetRect(rect, insets))

 }
 override func intrinsicContentSize() -> CGSize {
  var intrinsicSuperViewContentSize = super.intrinsicContentSize()
  intrinsicSuperViewContentSize.height += topInset + bottomInset
  intrinsicSuperViewContentSize.width += leftInset + rightInset
  return intrinsicSuperViewContentSize
 }
}
На ViewController:
override func viewDidLoad() {
  super.viewDidLoad()

  let labelName = sampleLabel(frame: CGRectMake(0, 100, 300, 25))
  labelName.text = "Sample Label"
  labelName.backgroundColor =  UIColor.grayColor()

  labelName.textColor = UIColor.redColor()
  labelName.shadowColor = UIColor.blackColor()
  labelName.font = UIFont(name: "HelveticaNeue", size: CGFloat(22))
  self.view.addSubview(labelName)
 }
или связать пользовательский класс UILabel на раскадровке как класс метки.
Swift 3, iOS10 решение:
open class UIInsetLabel: UILabel {

    open var insets : UIEdgeInsets = UIEdgeInsets() {
        didSet {
            super.invalidateIntrinsicContentSize()
        }
    }

    open override var intrinsicContentSize: CGSize {
        var size = super.intrinsicContentSize
        size.width += insets.left + insets.right
        size.height += insets.top + insets.bottom
        return size
    }

    override open func drawText(in rect: CGRect) {
        return super.drawText(in: UIEdgeInsetsInsetRect(rect, insets))
    }
}
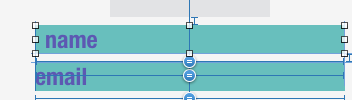
Я немного отредактировал в принятом ответе. Есть проблема, когда
leftInsetиrightInsetувеличение, часть текста исчезнет, b / c ширина метки будет сужена, но высота не увеличивается, как на рисунке:
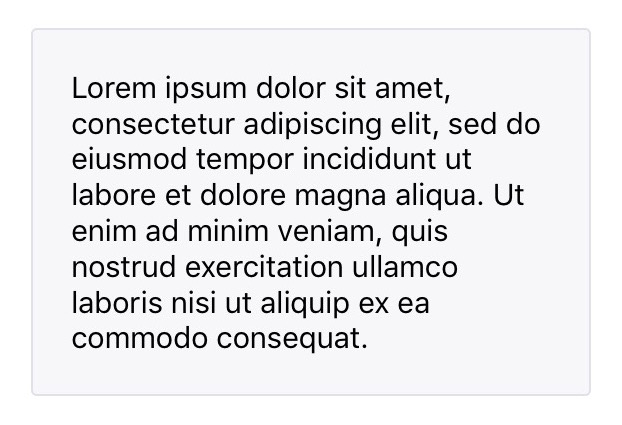
чтобы решить эту проблему, вам нужно пересчитать высоту текста следующим образом:
@IBDesignable class PaddingLabel: UILabel {

  @IBInspectable var topInset: CGFloat = 20.0
  @IBInspectable var bottomInset: CGFloat = 20.0
  @IBInspectable var leftInset: CGFloat = 20.0
  @IBInspectable var rightInset: CGFloat = 20.0

  override func drawTextInRect(rect: CGRect) {
    let insets = UIEdgeInsets(top: topInset, left: leftInset, bottom: bottomInset, right: rightInset)
    super.drawTextInRect(UIEdgeInsetsInsetRect(rect, insets))
  }

  override func intrinsicContentSize() -> CGSize {
    var intrinsicSuperViewContentSize = super.intrinsicContentSize()

    let textWidth = frame.size.width - (self.leftInset + self.rightInset)
    let newSize = self.text!.boundingRectWithSize(CGSizeMake(textWidth, CGFloat.max), options: NSStringDrawingOptions.UsesLineFragmentOrigin, attributes: [NSFontAttributeName: self.font], context: nil)
    intrinsicSuperViewContentSize.height = ceil(newSize.size.height) + self.topInset + self.bottomInset

    return intrinsicSuperViewContentSize
  }
}
и результат:
Я надеюсь помочь некоторым людям в та же ситуация, что и у меня.
В Swift 3
лучший и простой способ
class UILabelPadded: UILabel {
     override func drawText(in rect: CGRect) {
     let insets = UIEdgeInsets.init(top: 0, left: 5, bottom: 0, right: 5)
     super.drawText(in: UIEdgeInsetsInsetRect(rect, insets))
    }

}
по состоянию на Swift 4.2 (Xcode 10 beta 6) "UIEdgeInsetsInsetRect" является устаревшим. Я также объявил класс публичным, чтобы сделать его более полезным.
public class UIPaddedLabel: UILabel {

    @IBInspectable var topInset: CGFloat = 5.0
    @IBInspectable var bottomInset: CGFloat = 5.0
    @IBInspectable var leftInset: CGFloat = 7.0
    @IBInspectable var rightInset: CGFloat = 7.0

    public override func drawText(in rect: CGRect) {
        let insets = UIEdgeInsets.init(top: topInset, left: leftInset, bottom: bottomInset, right: rightInset)
        super.drawText(in: rect.inset(by: insets))
    }

    public override var intrinsicContentSize: CGSize {
        let size = super.intrinsicContentSize
        return CGSize(width: size.width + leftInset + rightInset,
                      height: size.height + topInset + bottomInset)
    }

    override func sizeToFit() {
        super.sizeThatFits(intrinsicContentSize)
    }
}
Easy padding (Swift 3.0, ответ Элвина Джорджа):
  class NewLabel: UILabel {

        override func textRect(forBounds bounds: CGRect, limitedToNumberOfLines numberOfLines: Int) -> CGRect {
                return self.bounds.insetBy(dx: CGFloat(15.0), dy: CGFloat(15.0))
        }

        override func draw(_ rect: CGRect) {
                super.drawText(in: self.bounds.insetBy(dx: CGFloat(5.0), dy: CGFloat(5.0)))
        }

  }
другой вариант без подклассов будет:
- установить метку
textsizeToFit()затем немного увеличьте высоту метки, чтобы имитировать заполнение
label.text = "someText"
label.textAlignment = .center
label.sizeToFit()
label.frame = CGRect( x: label.frame.x, y: label.frame.y,width:  label.frame.width + 20,height: label.frame.height + 8)
легко
import UIKit

class ViewController: UIViewController {

    override func viewDidLoad() {
        super.viewDidLoad()
        // Do any additional setup after loading the view, typically from a nib.

        self.view.addSubview(makeLabel("my title",x: 0, y: 100, w: 320, h: 30))
    }

    func makeLabel(title:String, x:CGFloat, y:CGFloat, w:CGFloat, h:CGFloat)->UILabel{
        var myLabel : UILabel = UILabel(frame: CGRectMake(x,y,w,h))
        myLabel.textAlignment = NSTextAlignment.Right

        // inser last char to right
        var titlePlus1char = "\(title)1"
        myLabel.text = titlePlus1char
        var titleSize:Int = count(titlePlus1char)-1

        myLabel.textColor = UIColor(red:1.0, green:1.0,blue:1.0,alpha:1.0)
        myLabel.backgroundColor = UIColor(red: 214/255, green: 167/255, blue: 0/255,alpha:1.0)


        // create myMutable String
        var myMutableString = NSMutableAttributedString()

        // create myMutable font
        myMutableString = NSMutableAttributedString(string: titlePlus1char, attributes: [NSFontAttributeName:UIFont(name: "HelveticaNeue", size: 20)!])

        // set margin size
        myMutableString.addAttribute(NSFontAttributeName, value: UIFont(name: "HelveticaNeue", size: 10)!, range: NSRange(location: titleSize,length: 1))

        // set last char to alpha 0
        myMutableString.addAttribute(NSForegroundColorAttributeName, value: UIColor(red:1.0, green:1.0,blue:1.0,alpha:0), range: NSRange(location: titleSize,length: 1))

        myLabel.attributedText = myMutableString

        return myLabel
    }


    override func didReceiveMemoryWarning() {
        super.didReceiveMemoryWarning()
        // Dispose of any resources that can be recreated.
    }

}
Если вы хотите добавить 2px отступ вокруг textRect, просто сделайте это:
let insets = UIEdgeInsets(top: -2, left: -2, bottom: -2, right: -2)
label.frame = UIEdgeInsetsInsetRect(textRect, insets)
используйте этот код, если вы столкнулись с проблемой усечения при применении отступа.
@IBDesignable class PaddingLabel: UILabel {

 @IBInspectable var topInset: CGFloat = 5.0
 @IBInspectable var bottomInset: CGFloat = 5.0
 @IBInspectable var leftInset: CGFloat = 5.0
 @IBInspectable var rightInset: CGFloat = 5.0

 override func drawText(in rect: CGRect) {
      let insets = UIEdgeInsets.init(top: topInset, left: leftInset, bottom: bottomInset, right: rightInset)
      super.drawText(in: UIEdgeInsetsInsetRect(rect, insets))
 }

 override var intrinsicContentSize: CGSize {
      var intrinsicSuperViewContentSize = super.intrinsicContentSize
      let textWidth = frame.size.width - (self.leftInset + self.rightInset)
      let newSize = self.text!.boundingRect(with: CGSize(textWidth,    CGFloat.greatestFiniteMagnitude), options: NSStringDrawingOptions.usesLineFragmentOrigin, attributes: [NSFontAttributeName: self.font], context: nil)
      intrinsicSuperViewContentSize.height = ceil(newSize.size.height) + self.topInset + self.bottomInset
      return intrinsicSuperViewContentSize
 }
}
extension CGSize{
 init(_ width:CGFloat,_ height:CGFloat) {
      self.init(width:width,height:height)
 }
}
Если вы не хотите или должны использовать @IBInspectable / @IBDesignable UILabel в раскадровке (я думаю, что они отображаются слишком медленно в любом случае), то чище использовать UIEdgeInsets вместо 4 разных CGFloats.
пример кода для Swift 4.2:
class UIPaddedLabel: UILabel {
    var padding = UIEdgeInsets(top: 0, left: 0, bottom: 0, right: 0)

    public override func drawText(in rect: CGRect) {
        super.drawText(in: rect.inset(by: padding))
    }

    public override var intrinsicContentSize: CGSize {
        let size = super.intrinsicContentSize
        return CGSize(width: size.width + padding.left + padding.right,
                      height: size.height + padding.top + padding.bottom)
    }
}
легкий обивка:
import UIKit

    class NewLabel: UILabel {

        override func textRectForBounds(bounds: CGRect, limitedToNumberOfLines numberOfLines: Int) -> CGRect {

            return CGRectInset(self.bounds, CGFloat(15.0), CGFloat(15.0))
        }

        override func drawRect(rect: CGRect) {

            super.drawTextInRect(CGRectInset(self.bounds,CGFloat(5.0), CGFloat(5.0)))
        }

    }
просто используйте autolayout:
let paddedWidth = myLabel.intrinsicContentSize.width + 2 * padding
myLabel.widthAnchor.constraint(equalToConstant: paddedWidth).isActive = true
сделано.
аналогично другим ответам, но с классом func для динамической настройки заполнения:
class UILabelExtendedView: UILabel
{
    var topInset: CGFloat = 4.0
    var bottomInset: CGFloat = 4.0
    var leftInset: CGFloat = 8.0
    var rightInset: CGFloat = 8.0

    override func drawText(in rect: CGRect)
    {
        let insets: UIEdgeInsets = UIEdgeInsets(top: topInset, left: leftInset, bottom: bottomInset, right: rightInset)
        super.drawText(in: UIEdgeInsetsInsetRect(rect, insets))
    }

    override public var intrinsicContentSize: CGSize
    {
        var contentSize = super.intrinsicContentSize
        contentSize.height += topInset + bottomInset
        contentSize.width += leftInset + rightInset
        return contentSize
    }

    func setPadding(top: CGFloat, left: CGFloat, bottom: CGFloat, right: CGFloat){
        self.topInset = top
        self.bottomInset = bottom
        self.leftInset = left
        self.rightInset = right
        let insets: UIEdgeInsets = UIEdgeInsets(top: top, left: left, bottom: bottom, right: right)
        super.drawText(in: UIEdgeInsetsInsetRect(self.frame, insets))
    }
}
одним из прагматических решений является добавление пустых меток той же высоты и цвета, что и основная метка. Установите начальное / конечное пространство для основной метки равным нулю, выровняйте вертикальные центры и сделайте ширину желаемым полем.
уточнение ответа Мунди.
т. е. встраивание меток в
UIViewи принуждать прокладку через автоматический план. Пример:
описание:
1) Создать
UIView("панель"), и задать его внешний вид.2) создать
UILabelи добавить его на панель.3) Добавьте ограничения для обеспечения заполнения.
4) Добавьте панель в иерархию представлений, затем расположите панель.
детали:
1) создает вид панели.
let panel = UIView()
panel.backgroundColor = .green
panel.layer.cornerRadius = 12
2) Создайте метку, добавьте ее в панель в качестве подвида.
let label = UILabel()
panel.addSubview(label)
3) Добавьте ограничения между краями метки и панели. Это заставляет панель держаться на расстоянии от метки. т. е. "обивка"
редакция: делать все это вручную очень утомительно, многословно и ошибок. Я предлагаю вам выбрать автоматическую обертку макета из GitHub или напишите его сами
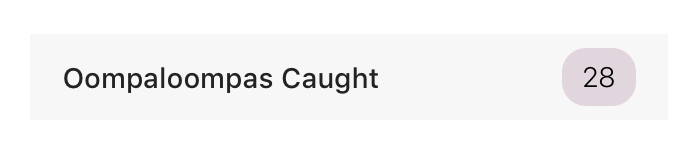
label.panel.translatesAutoresizingMaskIntoConstraints = false
label.topAnchor.constraint(equalTo: panel.topAnchor,
    constant: vPadding).isActive = true
label.bottomAnchor.constraint(equalTo: panel.bottomAnchor,
    constant: -vPadding).isActive = true
label.leadingAnchor.constraint(equalTo: panel.leadingAnchor,
    constant: hPadding).isActive = true
label.trailingAnchor.constraint(equalTo: panel.trailingAnchor,
    constant: -hPadding).isActive = true

label.textAlignment = .center
4) Добавьте панель в иерархию представлений, а затем добавьте ограничения позиционирования. например, обнимите правую сторону tableViewCell, как в примере изображения.
Примечание: вам нужно только добавить позиционные ограничения, а не размерные ограничения: Auto Layout будет решать макет на основе обоих
intrinsicContentSizeметки и ограничений, добавленных ранее.hostView.addSubview(panel) panel.translatesAutoresizingMaskIntoConstraints = false panel.trailingAnchor.constraint(equalTo: hostView.trailingAnchor, constant: -16).isActive = true panel.centerYAnchor.constraint(equalTo: hostView.centerYAnchor).isActive = true
Comments